How to Add a Professional Email Signature in Mailbird
As Mailbird is undoubtedly a nice alternative to any desktop app email client, you sure need a signature added there. Even if you are a solo user, an email signature in Mailbird can help with making your message look more human. Also, everything that goes in email footer you can utilize as a marketing channel.
Refer to this blog post to find out more: The Most Effective Ways to Structure Your Email Signatures to Kickass Your Business Communication
How do you add an email signature in Mailbird
Mailbird desktop client has a simple email signature installation process.
1. Open Mailbird app. Click the button in the top right corner and choose ‘Settings.’

2. In the opened window, go to ‘Identities’ and choose the account where you want to add a signature. You can create a new one clicking ‘Add’ or use an existing one (then choose ‘Edit’).
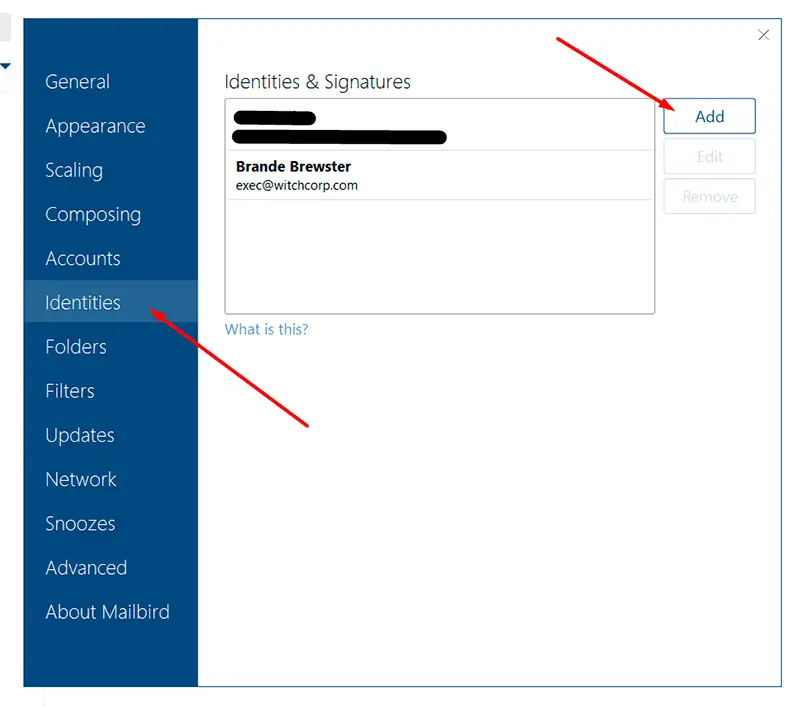
3. Fill in the required information if needed and paste your signature to the dialog box. If you use more than one account, make sure you’ve checked the box “Use a different signature than for.”

4. When you compose a new email, your email signature in Mailbird will be automatically added at the bottom.
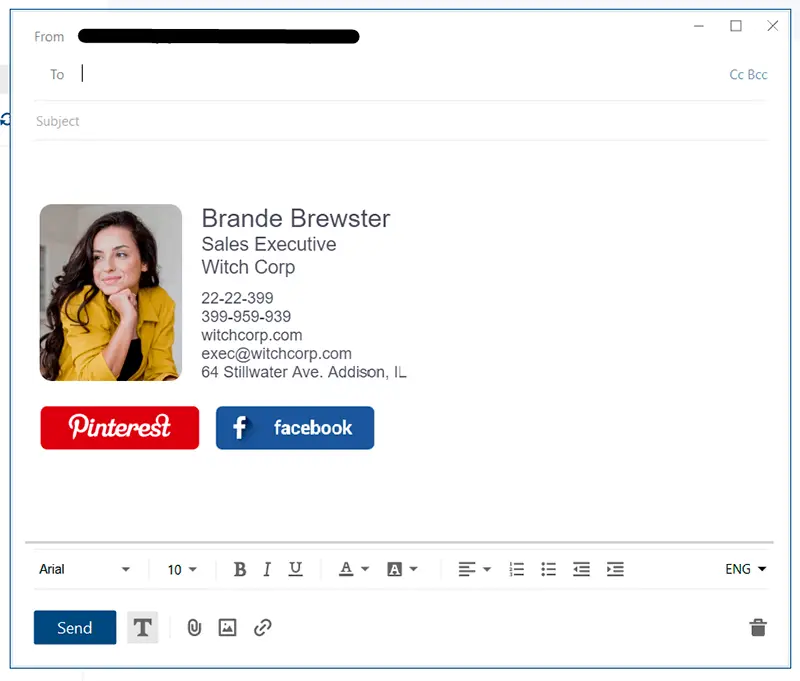
How to create an email signature
If you’re wondering how to make a proper email signature that really stands out and works in every email client, Mailbird included, here are the steps.
1. Go to the Newoldstamp email signature generator.
2. Fill in your basic info and add contact information.
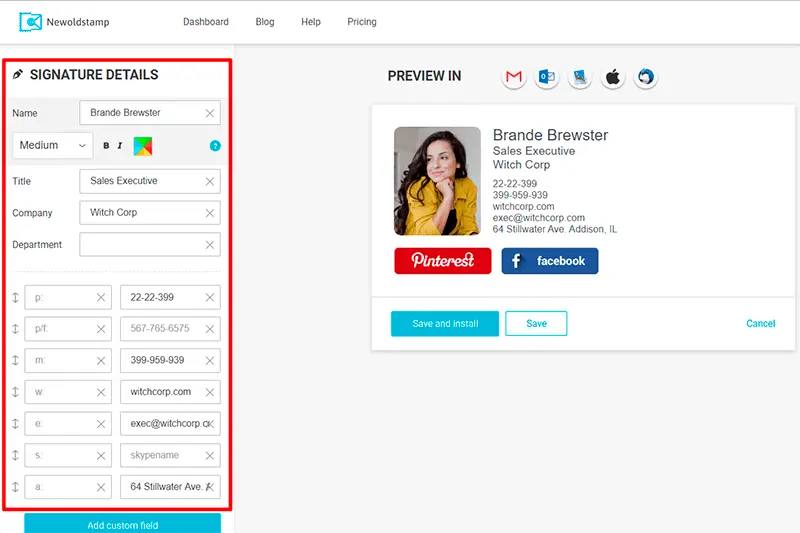
3. Add your photo or company logo. Also, choose and adjust social media icons that will be linked to your profiles.

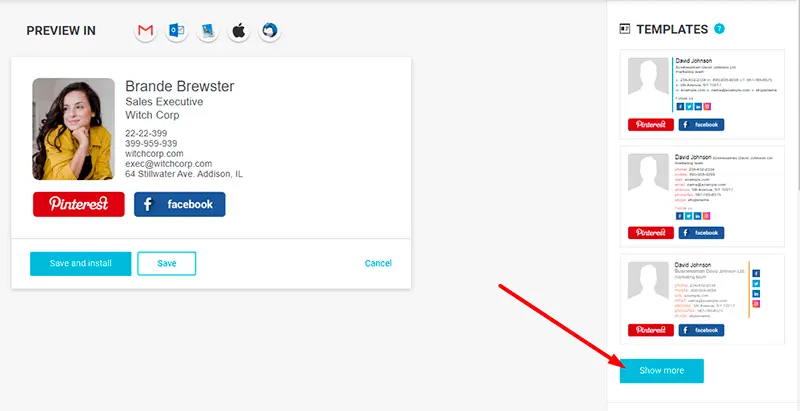
4. Choose the email signature template that fits you the best.
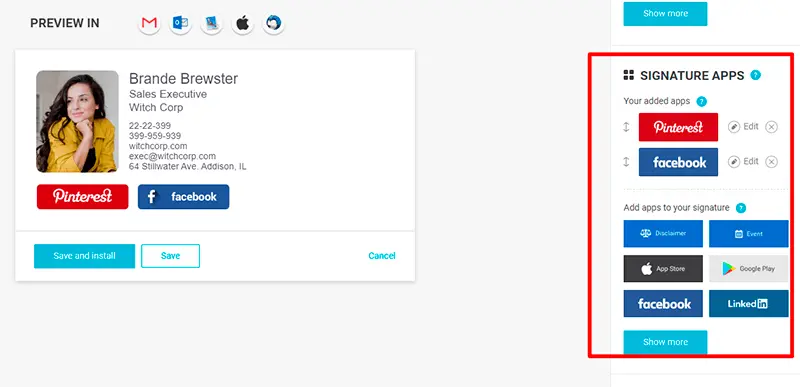
5. Choose from the variety of signature apps that Newoldstamp has tp offer. This could be custom CTA links and buttons, legal disclaimer, AppStore installation link, etc.
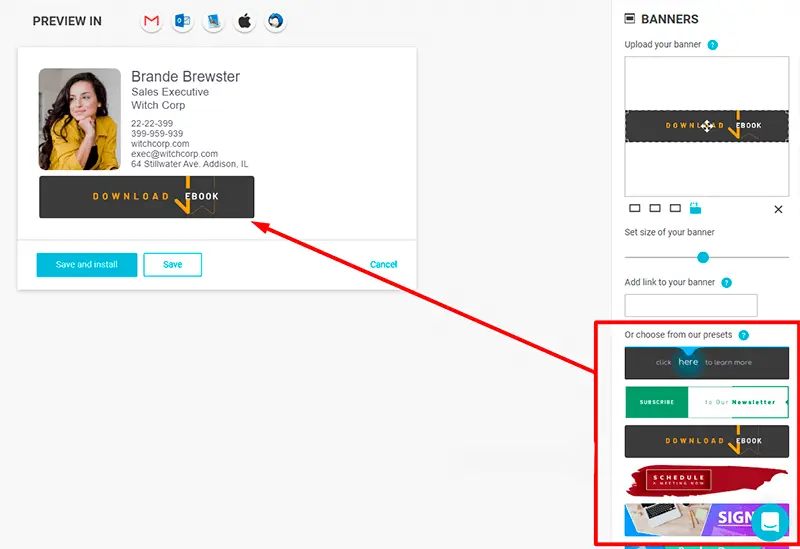
6. Consider using an email signature banner that can help you promote anything with each email sent.
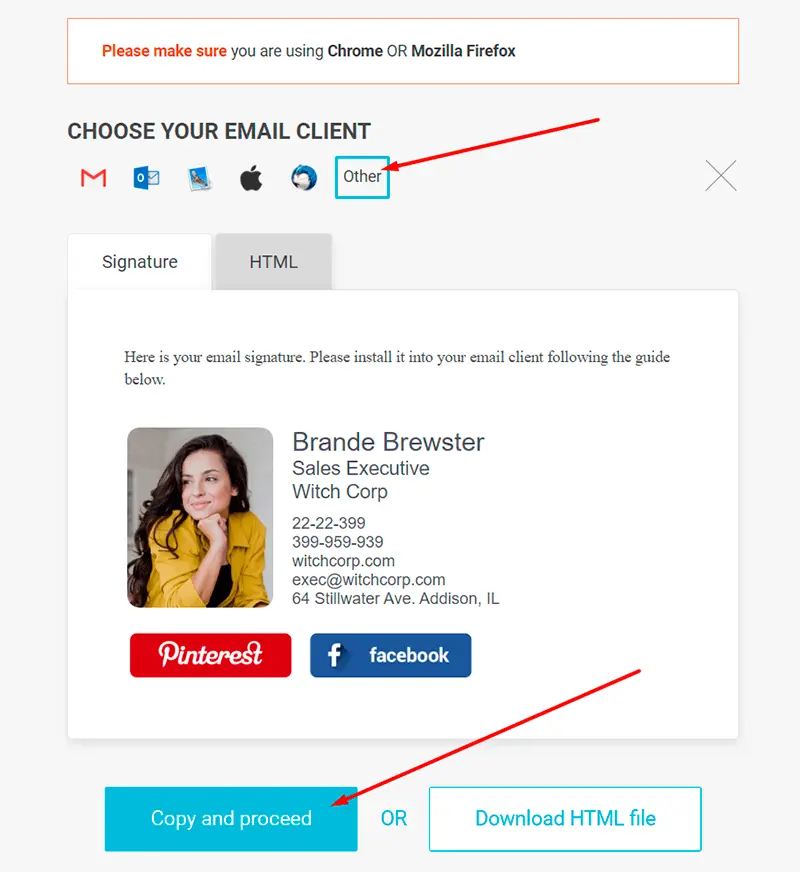
7. When you’re finished with your email signature, click ‘Save and install.’

8. Choose the ‘Other’ option and click ‘Copy and proceed.’ Now you can insert your email signature in Mailbird as described above.
As you can see, creating and installing an email signature to your Mailbird account is easy and takes just a couple of minutes. However, there’s no better way to promote yourself or your brand via email than with a signature. Its marketing opportunities are endless.
So, do use Newoldstamp signature generator that can help you create a responsive email signature for Mailbird easily and effortlessly.


