How to Add an Email Signature in eM Client
1. How to set a signature in eM Client?
2. How to change an email signature in eM Client?
3. How to add a Newoldstamp signature in eM Client?
eM Client is one of the most user-friendly email clients available on the market so installing a professionally looking email signature won’t take you much time. Just follow the instructions below to brand your eM mail client footer.
How to set a signature in eM Client?
Step 1:
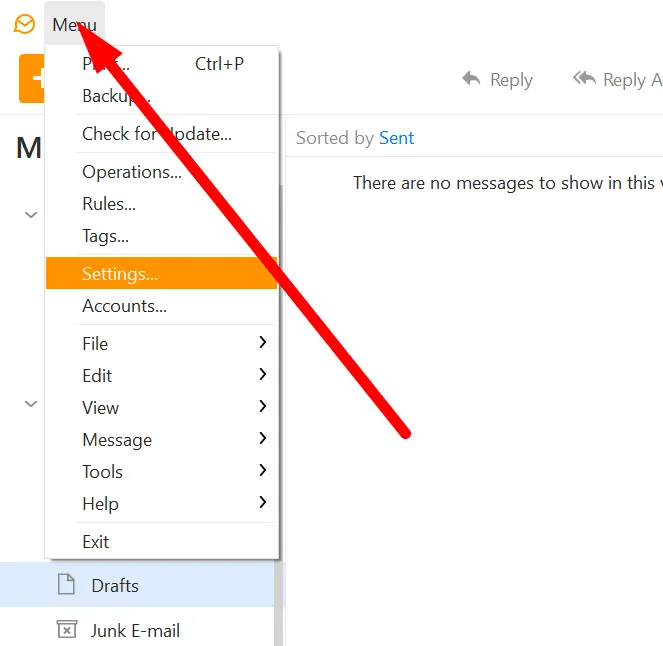
To add a new signature in eM Client, go to Menu at the top of the screen (next to eM client logo) and select eM client Settings.
Step 2:
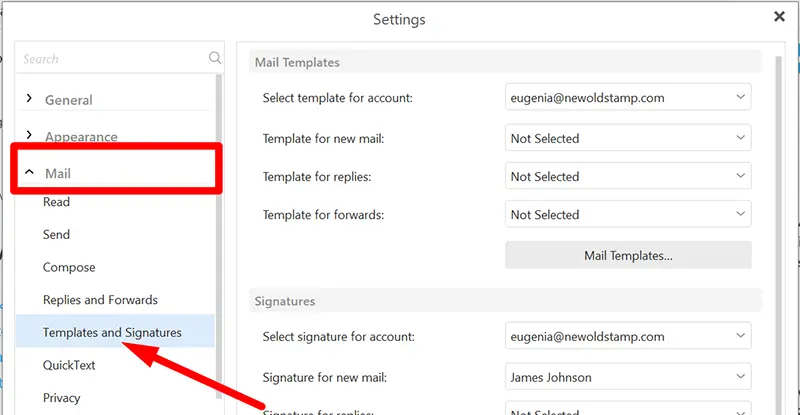
In the emerging window, expand the Mail section and open the Templates and Signatures tab.
Step 3:
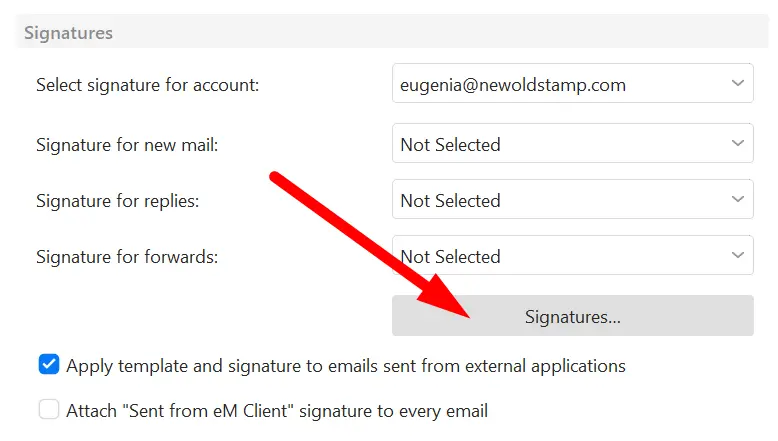
Once you have clicked on the Signatures button, a new window will appear.
Step 4:
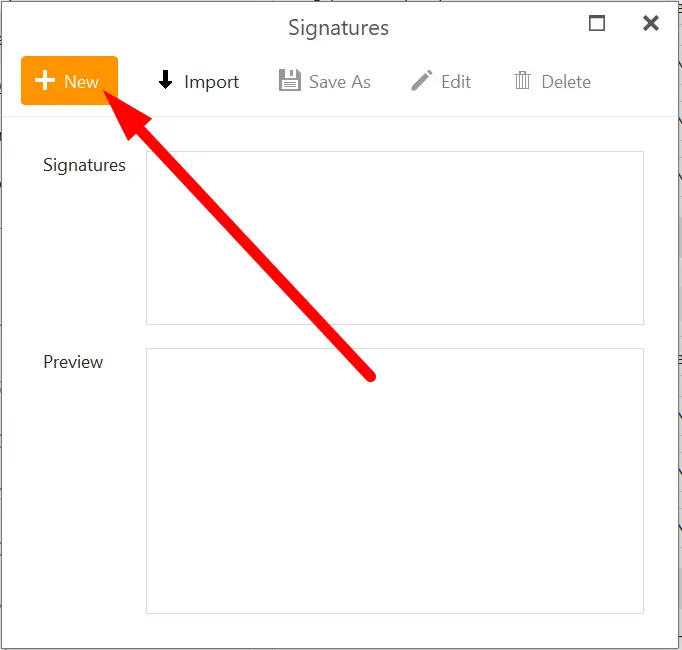
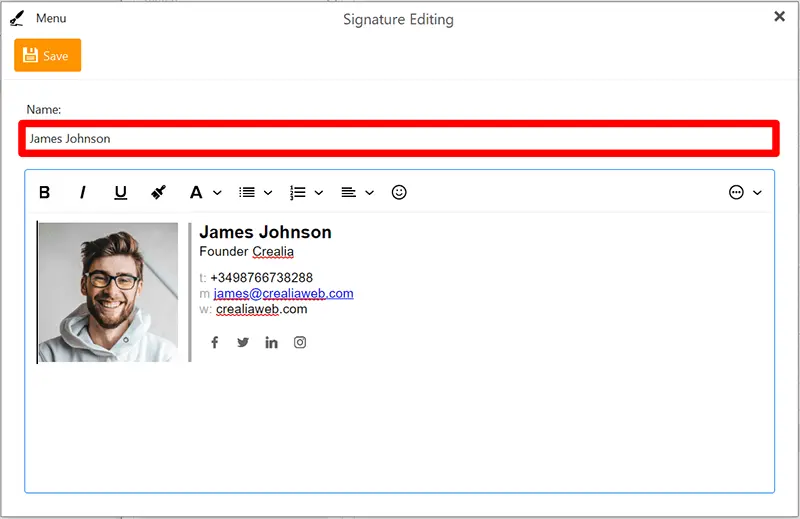
Press the New button, type a name for your new email signature and insert your email sign-off in the text box below. If you don’t have a professional email signature yet, you can create one from scratch using eM Client features, create eM client signature HTML or our signature generator. Make sure you click the Save button at the top of the window to save the signature.
Step 5:
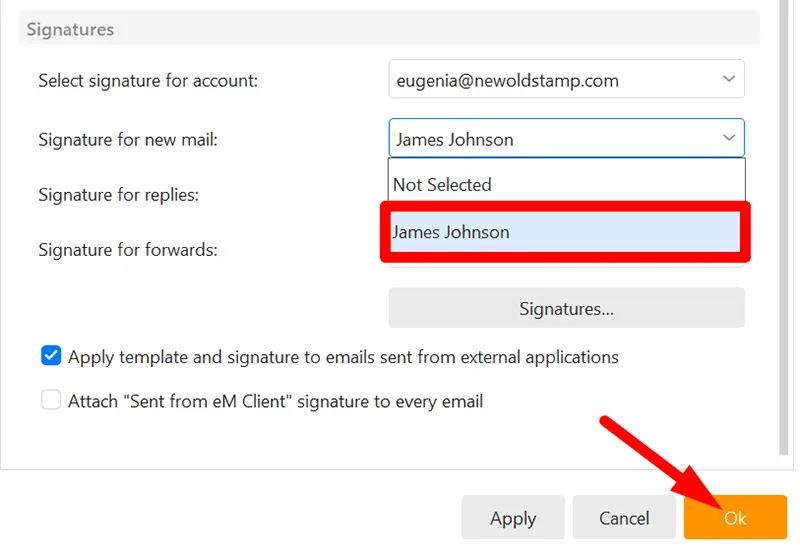
How to save signature in email? Go back to the Settings section to select where you want your email signature to appear (in new emails, replies, or forwards). Pick the necessary sign-off in the drop-down menu or leave the fields blank. Press the Apply and Ok buttons to save the changes.
Step 6:
That’s it! Now your new email signature will automatically appear in emails created with eM Client.
How to change an email signature in eM Client?
Step 1:
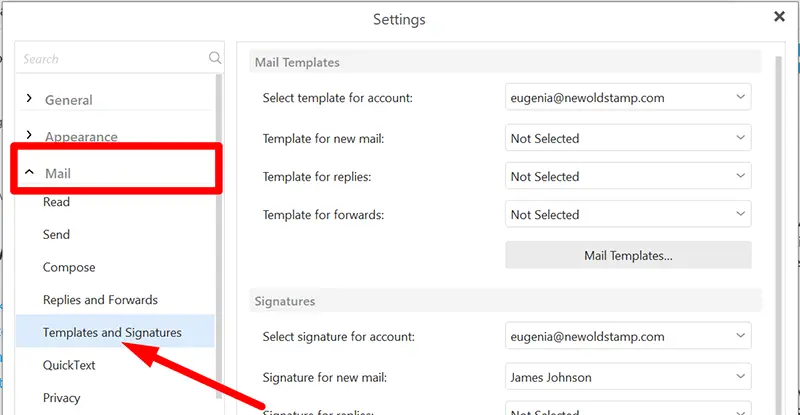
To change your eM Client email signature, head over to Menu -> Settings. Expand the Mail section on the left and choose Templates and Signatures.
Step 2:
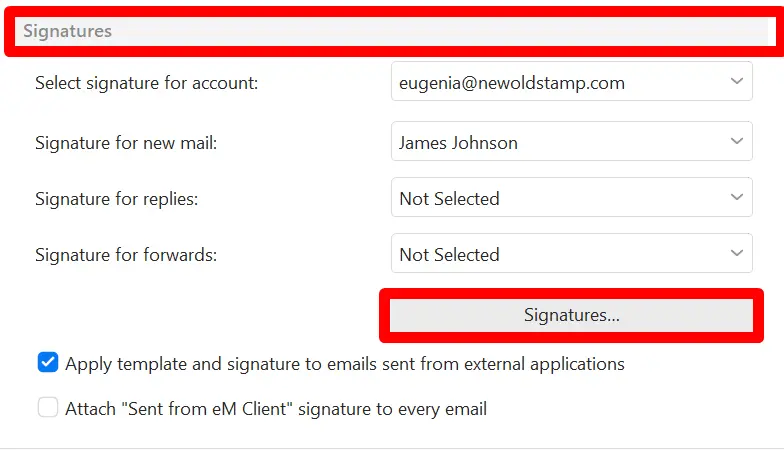
Go to the Signatures section and press the Signatures button.
Step 3:
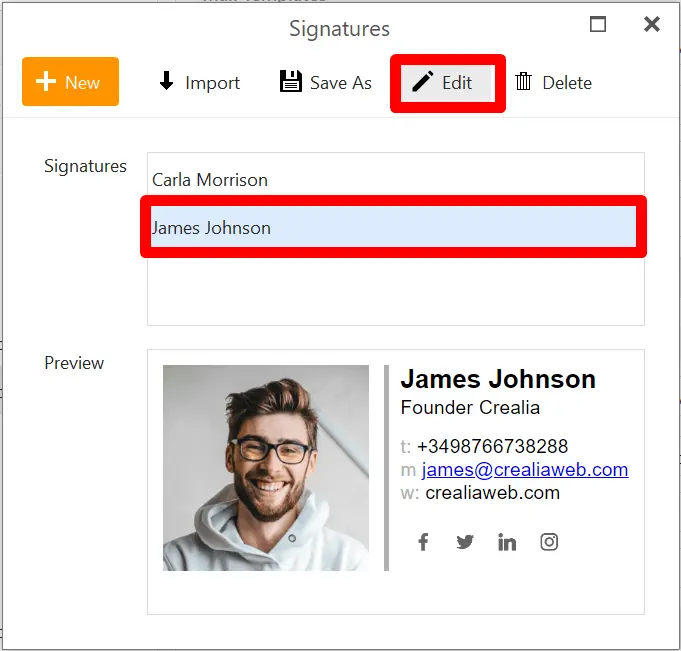
A new window will appear. Select the signature you want to edit by double-clicking it or by pressing the Edit button.
Step 4:
Make the necessary changes in the signature box and press the Save button.
How to add a Newoldstamp signature in eM Client?
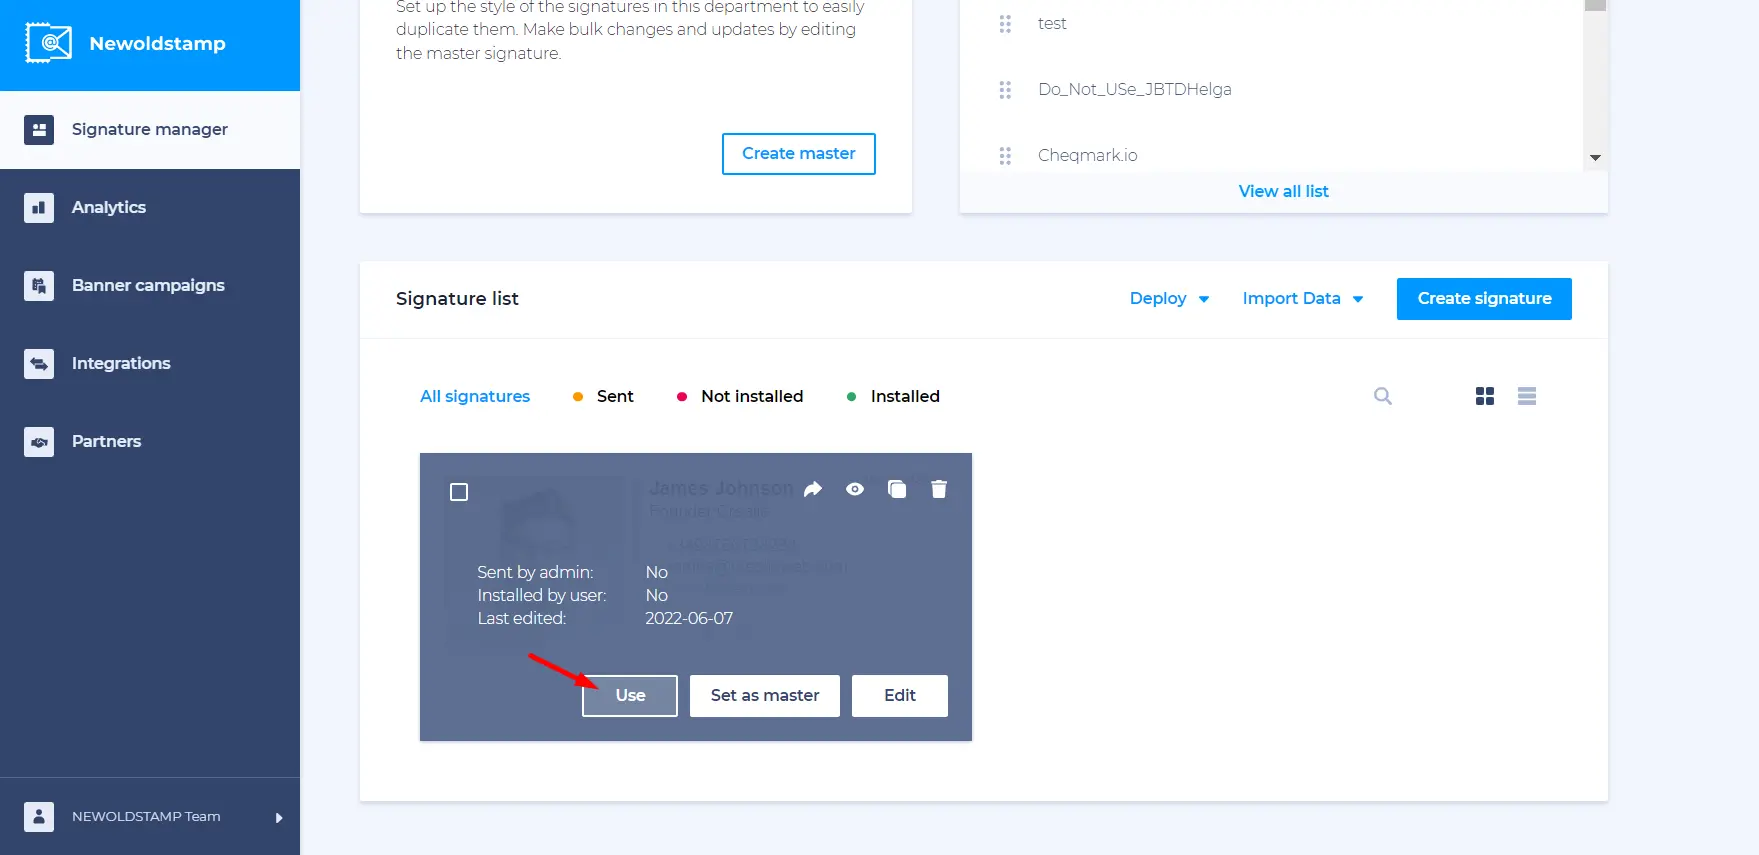
If you have created your team’s email signatures using Newoldstamp, head over to the Newoldstamp dashboard, select the signature you want to install, and press the Save and Install button.
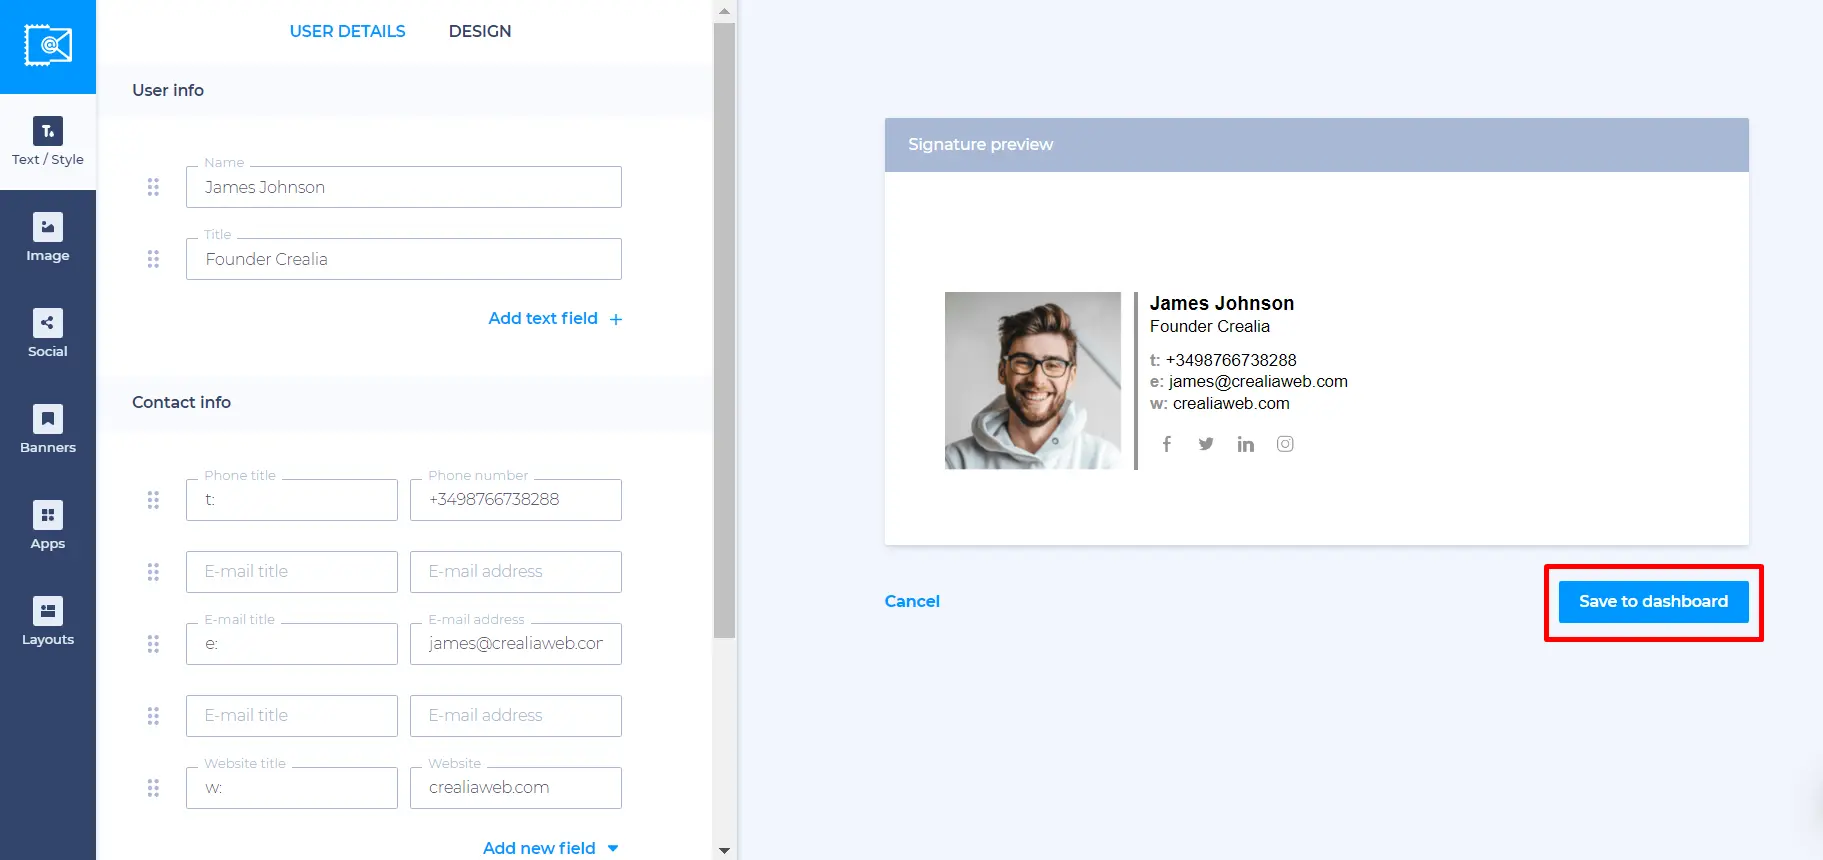
In the emerged window select the Other tab at the top and click on Copy and Proceed. Now your signature has been copied to the clipboard.
Next, we will see how to set email signature. Open the eM Client and go to the signature settings following the steps described above. Insert your HTML sign-off into the signature box pressing Ctrl+V or Cmd+V or right-clicking on the signature box and choosing the Paste option.
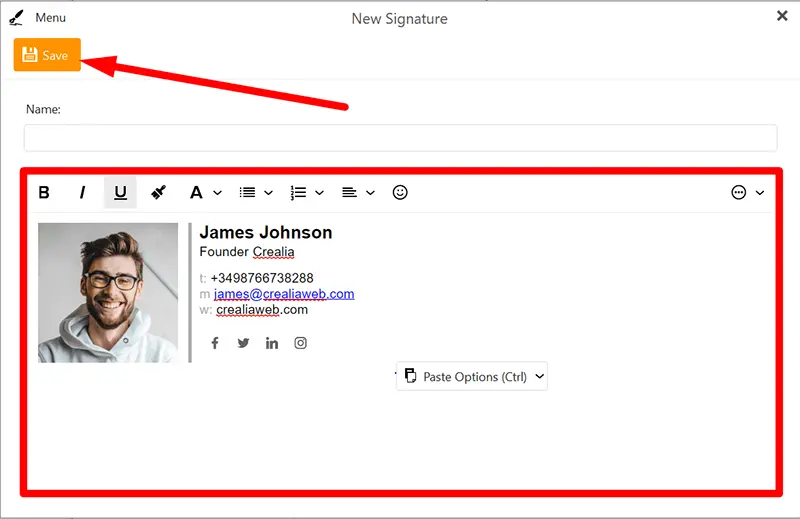
Give your new signature a name and press the Save button. Once you have chosen where you want your sign-off to appear, it will be automatically added to your new emails, responses, or forwards. If you wonder to know how to change signature after saving, you can always go to the editor and add to eM client signature new elements.
You’ve done it! Now you know how to create, change and edit signatures in eM Client!
Conclusion
Follow this step-by-step guide to learn how to add email signature to eM client.


