
How to add a signature to MailPilot
Leaving a lasting positive impression is hard. Leaving it with the help of email is even more challenging. Luckily, email signatures took the function of lasting impression and brought them to a qualitatively new level.
Numerous email users worldwide thrive to add attention-getting yet professional email signatures to their emails. Therefore, modern email signature generators aiming to solve this problem offer multiple integrations to fit any email user.

source: Mail Pilot
Here is our comprehensive guide for dedicated MailPilot users eager to make the email messages even more professional and effective. Let us move on with step-by-step instructions to ensure the process runs smoothly and fast enough for you.
Before starting
First things first, let's make sure you have everything you need to add an email signature to your MailPilot account:
- Mozilla Firefox or Google Chrome browser installed on your desktop.
- An HTML email signature file opened in one of the abovementioned browsers. The HTML email signature can be easily created with the help of an email signature generator. It may include not only your personal contact details and photo but useful links, CTA`s, and an email signature banner ad all combined in a few clicks.
Here is a step-by-step instruction to follow after you make sure everything is ready.
Step 1
Create an email signature.
Consider using our Newoldstamp email signature generator to create your email signature, set the desirable colors, fonts, and image shapes, as well as add social media icons, links, and banners: 
- Open the email signature generator
- Fill in the necessary information and contact details
- Choose the font style and size
- Upload your company logo or personal photo
- Add social network links
- Choose the best suiting template
- Add some colors to your signature
- Upload a promo banner or choose from the available presets
- Add signature apps if you need more advertising features
- Press save and proceed to install the signature.
Step 2
Open MailPilot. Click on the `Preferences` window from your MailPilot top toolbar.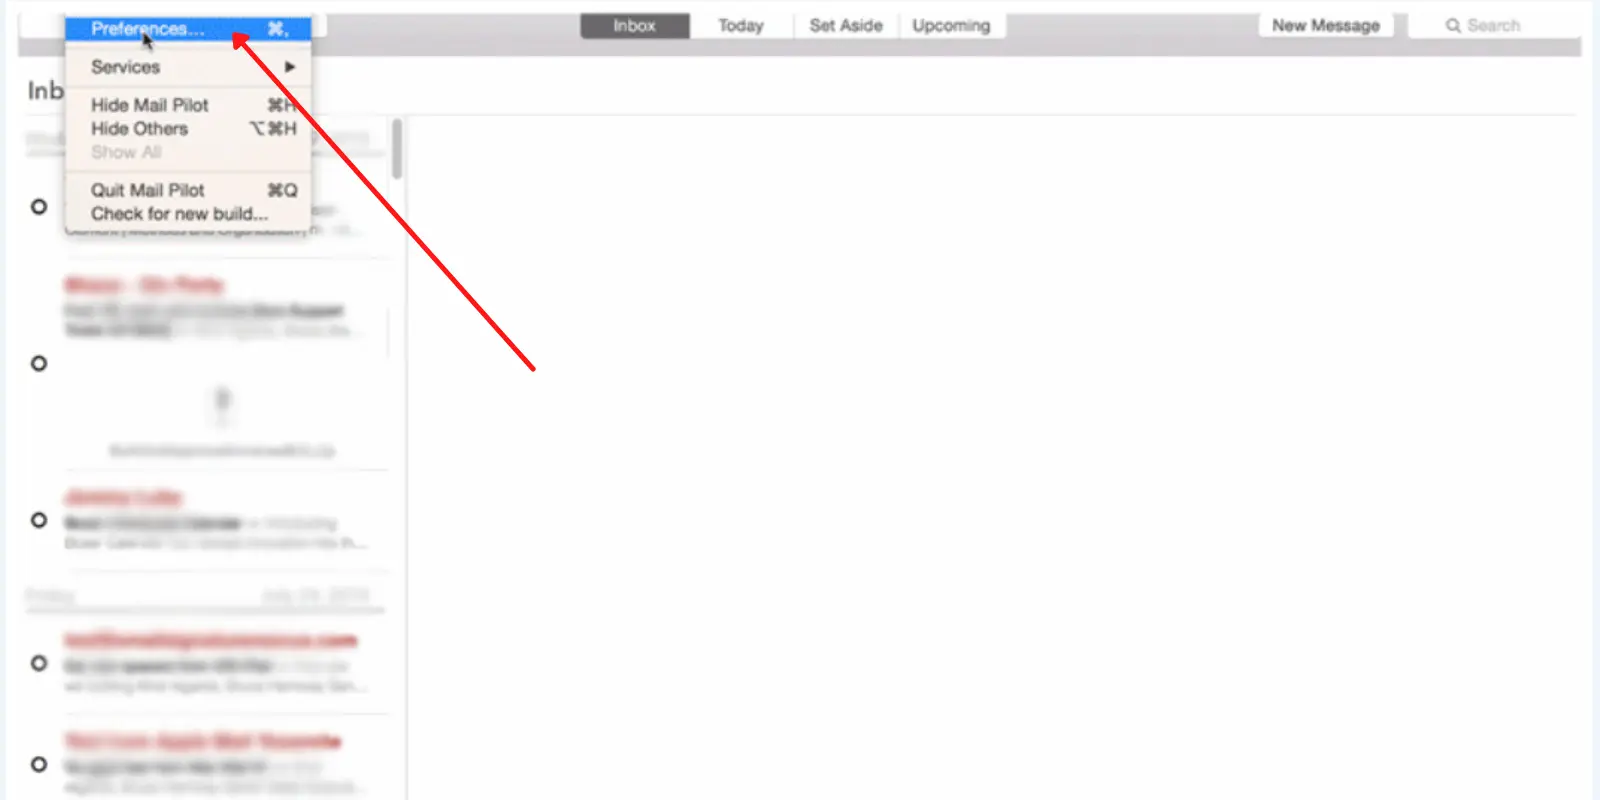
Step 3
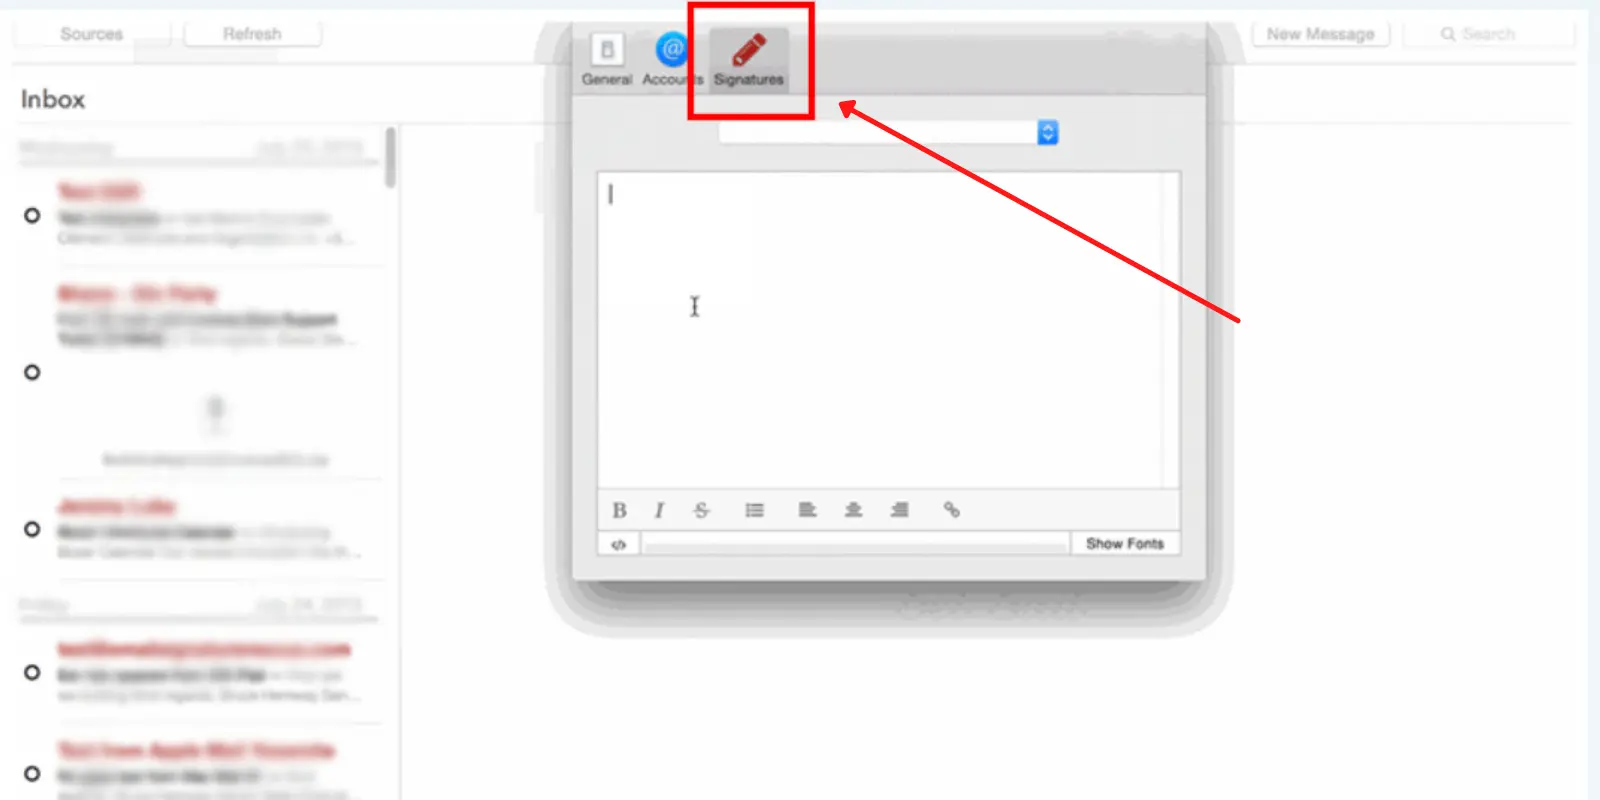
Click on the `Signatures` tab from your `Preferences` window. Select your email account and click inside the signature field. Press `Ctrl+V` to insert the previously copied HTML signature.
Step 4
Look through the pasted element carefully and close the `Preferences` window.
Step 5
Compose a new letter to check if the email signature is added automatically and Shows up correctly.
Try your newly added email signature by sending the email to yourself or one of your friends. In case everything works fine and looks good, that’s it. The process is successfully completed.
Troubleshooting
The signature got broken, or the images got stacked one under another instead of the preplanned side-by-side location
HTML signatures often appear to be broken if copied from Safari. In case you happen to experience these inconveniences, there is an easy way out. You'll need to open an HTML signature file in Google Chrome or Mozilla Firefox, or to be logged into your email signature generator account using Chrome or Firefox. Be sure to copy the signature from there and paste it once again.
As you can see, adding an email's signature to MailPilot requires just a few simple actions and a few minutes of your time. As there is no better way to promote yourself and creating a lasting impression than an email signature, consider creating a one for yourself or updating the existing one with powerful features like links, CTA`s, or banner ads.

