How to add a signature to ZohoCRM
ZohoCRM is one of the top communication channels with customers for 250,000 businesses. Having email be the key feature, Zoho CRM allows adding an HTML signature in no time. Follow the below-described steps to add your personalized signature to the emails sent out to your customers from Zoho CRM.
source: Zoho
Get prepared
To speed up the process, be sure to have an HTML signature file downloaded and opened on your browser or an HTLM signature generated utilizing the Newoldstamp email signature generator. 
- Sign up for an email signature generator
- Start creating the signature by adding your contact details
- Customize the font style and size
- Upload your company logo or personal photo
- Add social media icons with corresponding links
- Choose the most appealing template
- Add some colors
- Upload banner or choose a preset
- Press save and proceed.
- On the installation, page select and copy HTML Code
Step 1
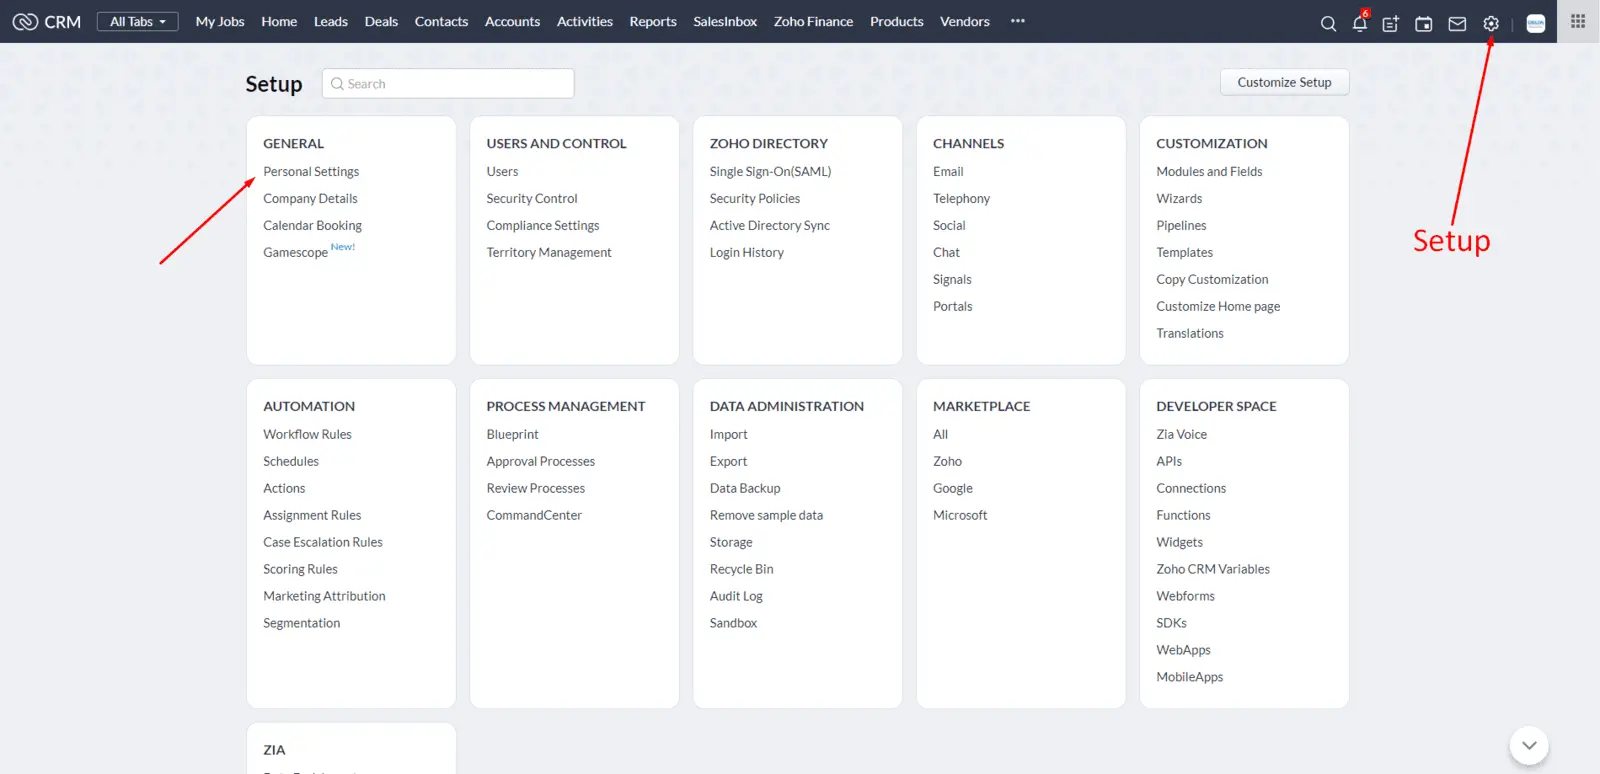
Log in to your Zoho CRM account. On the top right of your screen, click the general ‘Settings’ icon.
Step 2
Now proceed to the ‘Personal Settings’ items under the first General heading of your Setup page. 
Step 3
The signature field will appear just below your Locale Information. Click the pencil icon at the top-right of the signature window for editing. To add an HTML signature go to ‘Edit HTML’ and paste the signature HTML code into the editor.
Step 4
Click the ‘Save’ to get your email signature installed.
Note
With Zoho CRM, you can also add signatures to your email templates. Even if you are using a template to email a group of contacts with different contact owners, each contact will receive an email with the email signature for their owner. Thus, Zoho will permanently attach the correct signature for its`s owner.


